Step by step guide to setting up your Google Maps listing
Step 1: Create or Claim Your Business Listing
First things first – check if your practice is already on Google Maps. Simply search for your practice’s name. If it’s there, great! You just need to claim it. If not, no worries – you can easily add it!

This step is extremely important – it’s the starting point of your online local presence. Make sure that the name, address, and contact details match exactly with what’s on your website and other online platforms (Facebook, etc.). Consistency is key for search engine optimization (SEO), and it helps patients recognize your practice quickly and easily.
Step 2: Verify Your Business
Once you’ve claimed or created your listing, Google will need to verify that your practice is a legitimate business. This is usually done via a phone call to your business address, but sometimes you can choose business video or postcard verification. This step is extremely important for the authenticity of your listing.
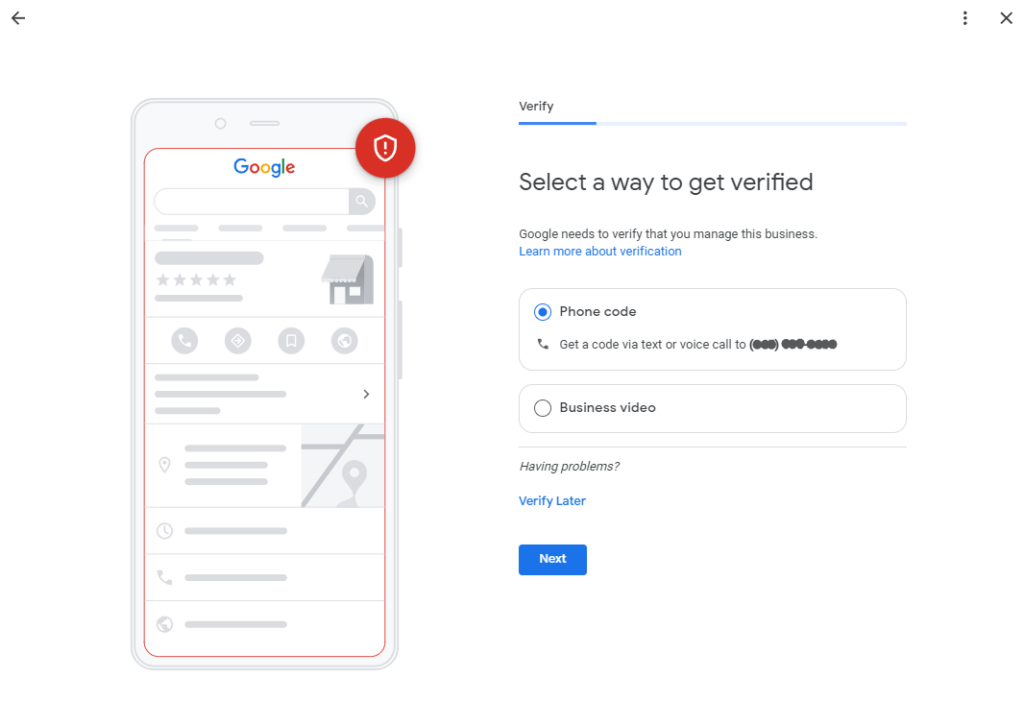
This step might seem like a formality, but it’s really important for building trust with Google and your potential patients. It’s a seal of authenticity that tells everyone that your practice is a real, operating entity.
Step 3: Optimize Your Listing with Detailed Information
This is where you fill out all of your listing’s more detailed information. Include everything: your practice’s address, phone number, hours of operation, link to your website, and a detailed description of your practices and services. The more comprehensive your make your Google Business profile, the easier it is for patients to see what you offer and how they can reach you or learn more.
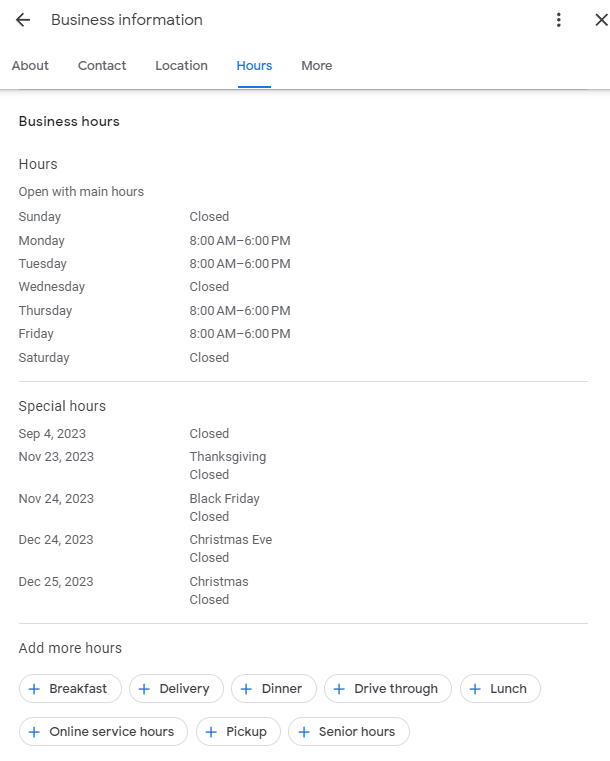
This is also the time to incorporate keywords relevant to your practice and location, which can improve your visibility in search results. Remember, patients usually choose a dental practice based on the information that is right in front of them – make sure yours is complete and compelling.
Step 4: Add High-Quality Photos
Photos make a huge difference. Upload high-quality, high-resolution images of your practice’s exterior and interior, your staff, and any specialized equipment or facilities you have. Before-and-after photos of dental treatments (with patient consent) can also be very persuasive!
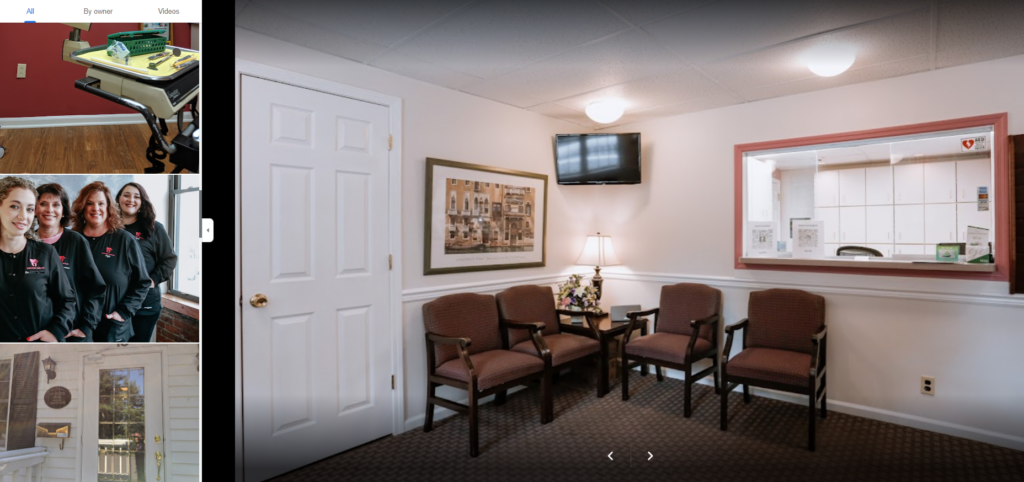
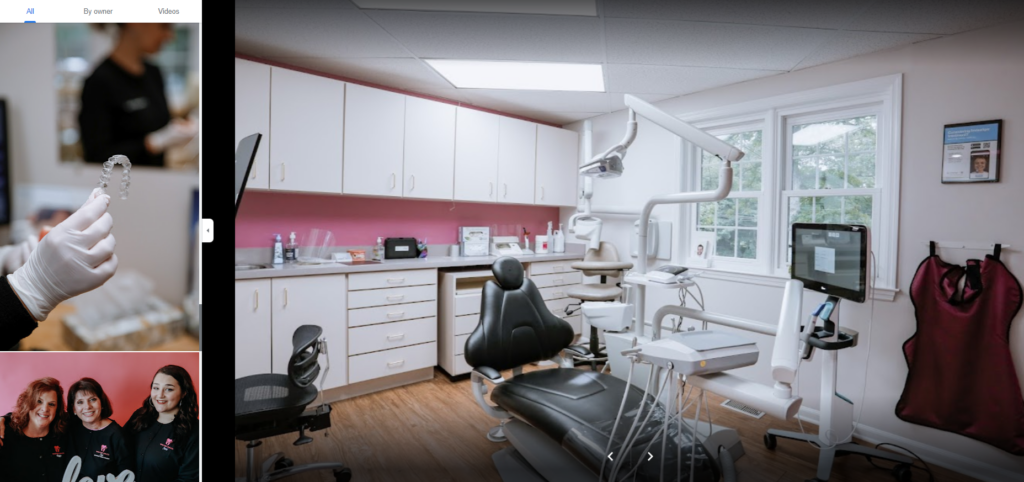
These types of pictures give potential patients a feel for your practice’s atmosphere and the level of care they can expect. It’s about creating a welcoming digital front door that invites patients into your practice.
Step 5: Encourage and Respond to Reviews
Positive reviews are like gold. Encourage your patients to leave their feedback and make sure to respond to each review. You can help get more reviews for your practice through follow-up emails, friendly reminders at the end of their visit, or even through signage with QR codes (that link directly to your Google Reviews) in your office.
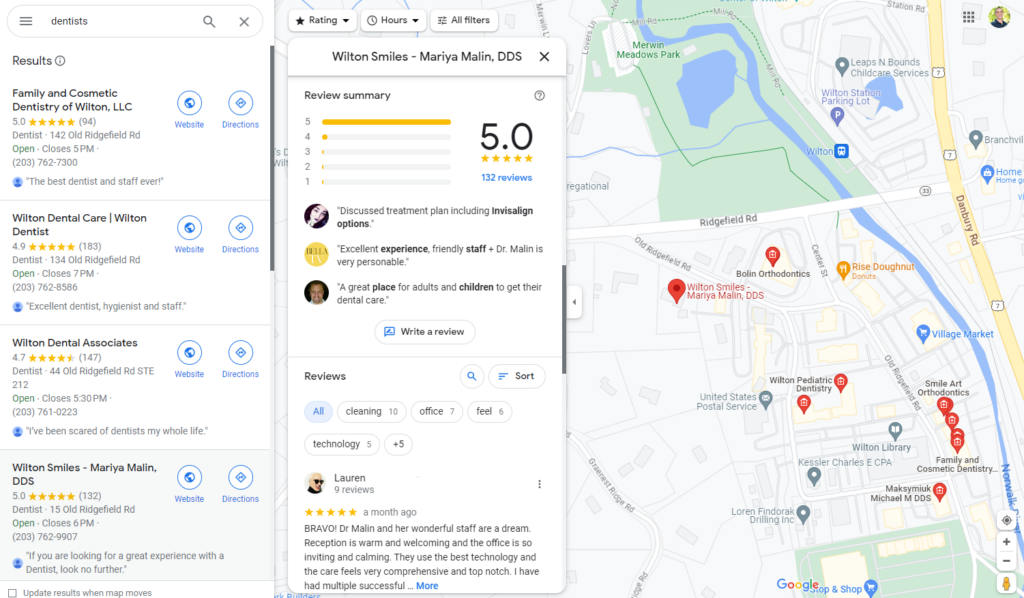
When your patients do leave reviews, whether they are glowing commendations or constructive criticisms, make sure that you respond to each one. A thoughtful response to a positive review shows appreciation and gratitude, and a considerate and solution-focused reply to a negative review demonstrates your commitment to patient satisfaction and continuous improvement. This type of interaction with your patients not only builds trust, but it also positively influences potential patients who read these reviews. It’s all about creating a narrative of care, attention, and responsiveness that reflects positively on your practice.
Step 6: Regularly Update Your Listing
An up-to-date Google Maps listing reflects an active and attentive dental practice. Make it a routine to check and update your listing regularly. And this includes not just the basics like your hours of operation or contact information – this means posting about any new services, technologies, or special promotions you are offering. For example, if you’ve recently started offering a new teeth whitening service, make sure it’s mentioned in your listing.
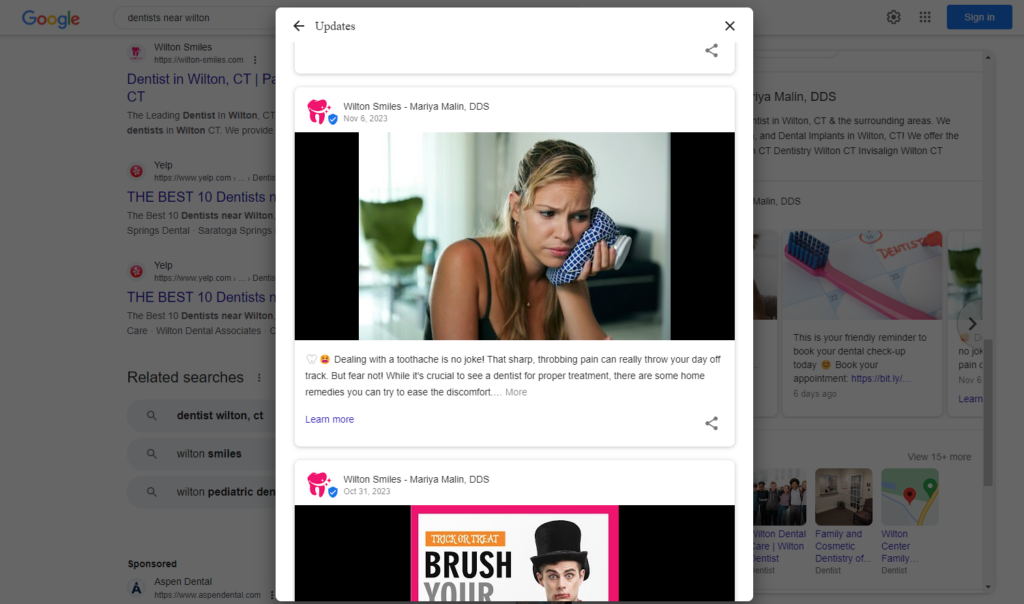
Regular updates can also include posts about community involvement, dental health tips, or even introducing new staff members. These updates not only keep your listing fresh but also help to engage with your audience. They act as reminders of your presence, and your commitment to providing up-to-date dental care, keeping your practice on the minds of both current and potential patients.
Step 7: Utilize the Q&A Feature
The Q&A feature on your Google Maps listing is an great opportunity to engage directly with potential patients. Check this section regularly and answer any questions as quickly and thoroughly as possible. This not only provides valuable information to the people asking questions, but also to others who may see your listing.
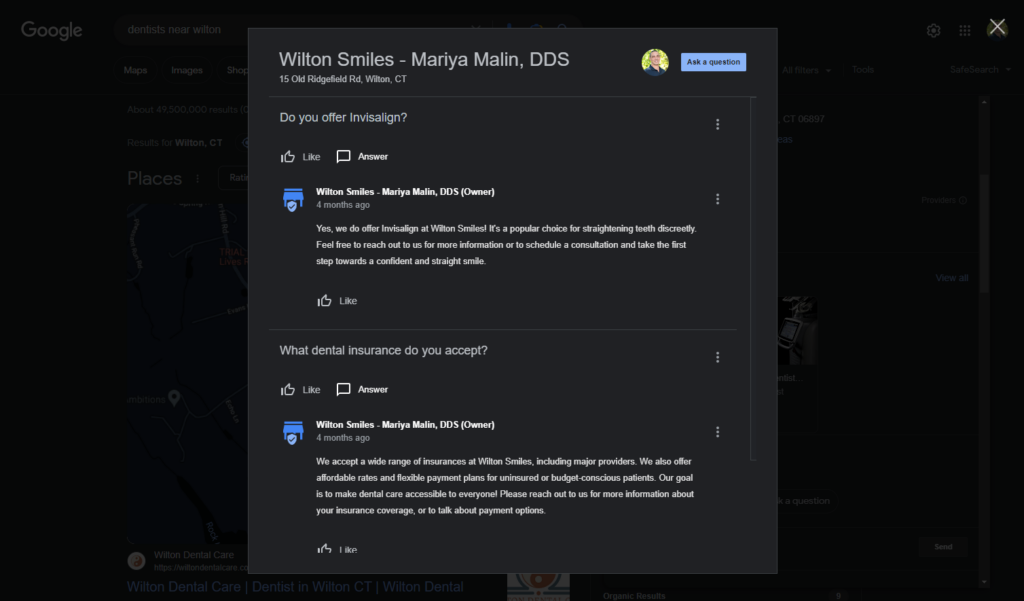
Consider adding frequently asked questions yourself and answering them. This could include questions about dental procedures, insurance policies, appointment scheduling, or COVID-19 safety measures. By giving potential patients clear and helpful answers, you establish your practice as helpful and authoritative. This feature is also a great way to clarify any misconceptions and provide accurate information about your services and practice policies.
Ready to get started?
Setting up a Google Maps listing for your dental practice is a straightforward yet powerful way to really improve your online presence. By following these steps, you’re not just putting your practice on the map – you’re opening the door to a world of potential nearby patients!
Need a hand getting your Maps listing just right? Smile Agency is here to help. Reach out to us for expert assistance in optimizing your online presence and making your practice the talk of the town!


0 Comments